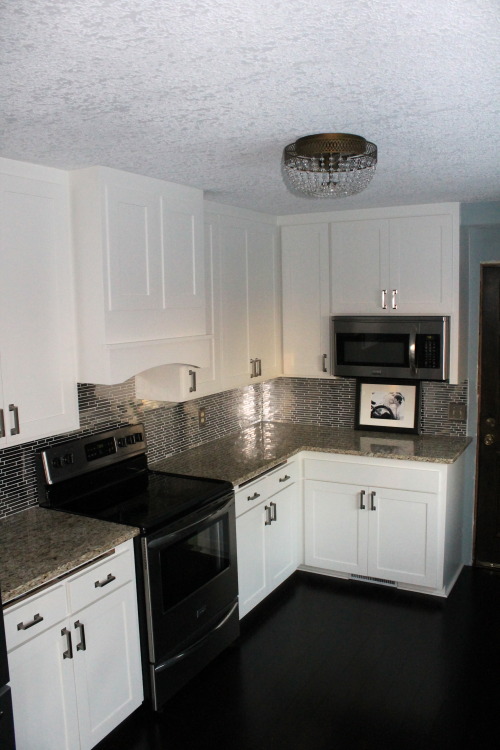
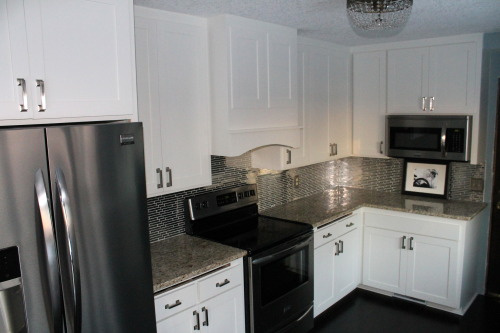
When we purchased our Otsego home to renovate the one thing we knew we wanted (as well as a ton of other things) was a range hood above the stove.
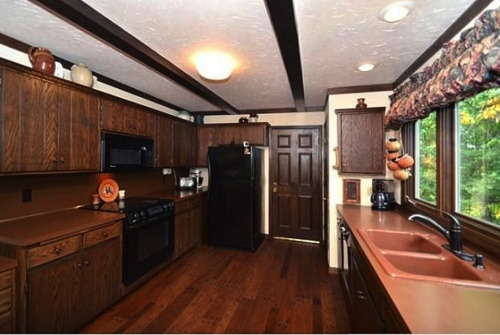
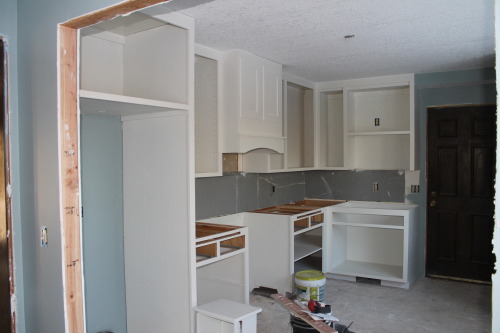
One thing for sure we knew we didn’t want was a microwave above the stove like the previous home owners had placed.
before
There are many benefits to having a range hood within your kitchen.
- They help with air quality, removing smoke from cooking as well as grease that can in the end coat your walls.
- Another great reason to place a hood above your stove is to provide additional lighting when cooking.
- If you are planning on reselling your home range hoods add style and increase the value to your home.
- And if you were like me- pregnant all year- you don’t need any extra heat! Hoods help to minimize the heat when cooking. Making dinner is an enough workout in itself.
And if you bring the cabinets up to the ceiling like we did, it makes the room feel a lot larger than it actually is. And bonus…you don’t have to clean the top of your cabinets!
There are so many different options to choose from when picking out the perfect kitchen range hood. They range from $200 to tens of thousands of dollars. So of course we made one ourselves and want to show you how you can too for under $40!
after
DIY Range Kitchen Hood Tutorial
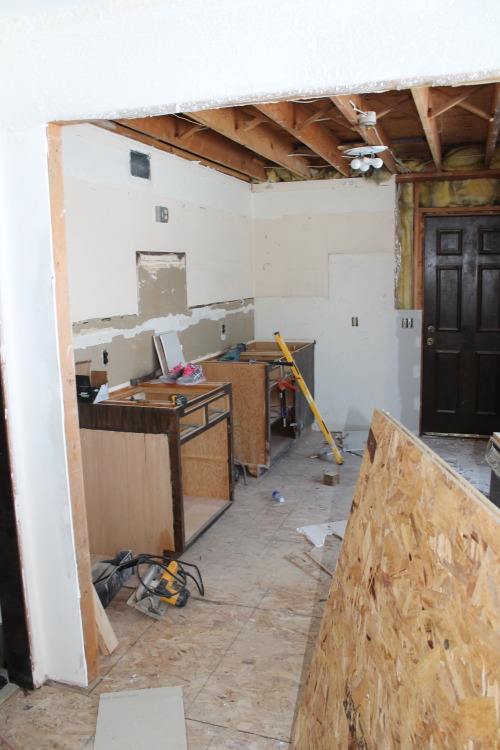
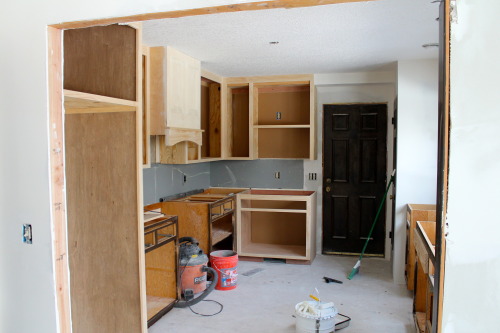
Let the demolition begin! First thing first is removing your cabinets or whatever you have placed above your stove. After demoing and cleaning you need to determine what ventilation you would like.
We knew we had to have a duct air ventilation put in to circulate outside. Another option is venting it through a filter which keeps it in the room with out having to run ducting. However, we wanted to duct it so the “dirty” air, smoke and grease were removed from the room.
We had a family friend come over to do the ventilation for us and put the ductwork in. Once the venting was done, Jamie began building the hood.
I gave Jamie about five different visuals of hoods that I loved off of Pinterest. So he took the inspiration from all of those photos and built the perfect hood to match our kitchen.
Materials
- 4x8x1/2 pine plywood
- 3x8x1/4 boards
- Wood glue
- Finish trim nails
We used pine for the hood being that was the most cost efficient and in the end we were going to paint the wood.
Jamie started by building a basic wooden box. Dimensions: 30 1/4″ wide + 36″ tall + 20 1/4″ deep.
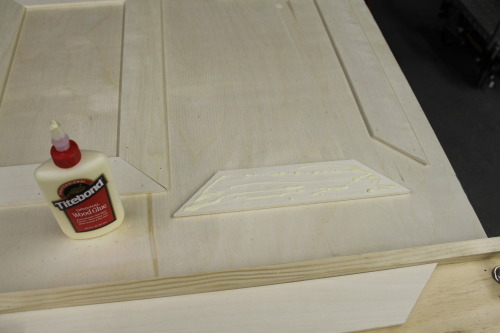
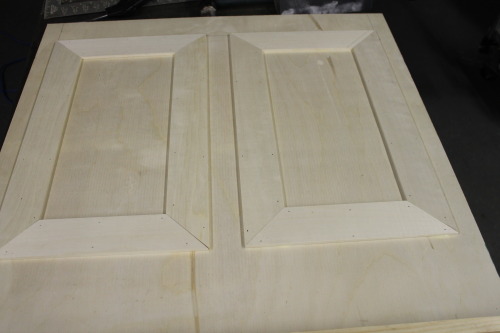
He then glued down 2x3x1/4 pieces of poplar onto the front of the cabinets to create dimension to match the cabinet doors. He also added an arched trim piece onto the bottom to add additional style and character. Above the arch he placed a piece of trim that projected out of the hood by gluing and nailing it into place.
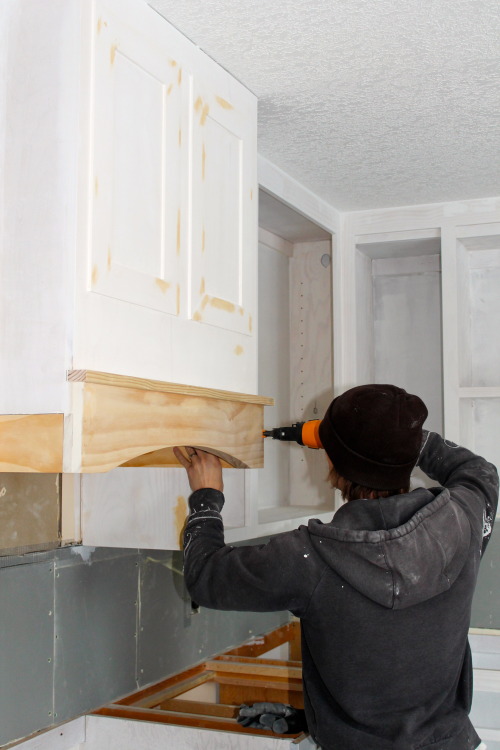
All the duct work was installed prior to the cabinets going back up. Once the hood cabinet got installed Jamie then installed the vent unit and screwed it in place. Jamie wedged the hood into place and screwed and nailed it into the sides of the cabinetry next to the hood.
After caulking and filling in the nail holes the last things to do was sand and paint. We used Benjamin Moore oil based white paint.
10 hours and $40 later we had ourselves a new beautiful kitchen hood!
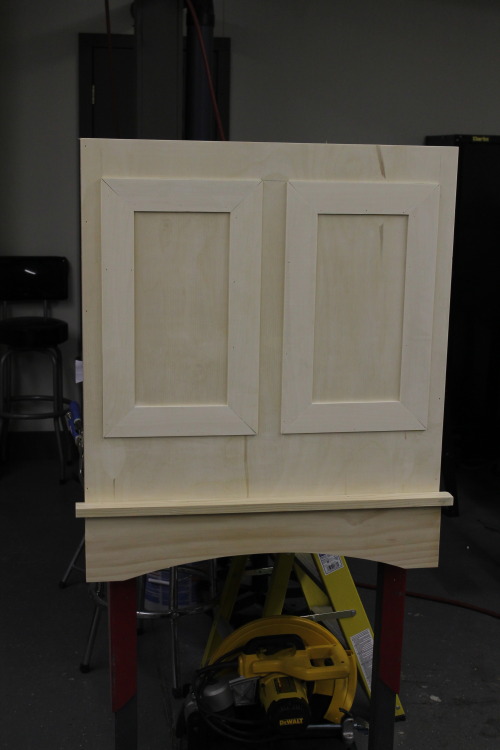

We used a string line as a compass to determine the arch we wanted and then cut it out. 🙂
How did you make the arch?
Thank you so much!
Absolutely Beautiful – you are truly talented! Thanks for sharing this with us.
We do love a good range! And they’re a must for well ventilation in the kitchen.
You wrote that in today’s market, range hoods are expected to be found in every kitchen and can actually hurt the value of your home if there isn’t one. I have been considering having a range hood installed, but wanted to learn more before I did anything. I’ll have to look around for a service that can provide custom ones, as my kitchen has a rather unique look. Thanks for info
Thank you!!
I’ve never thought we can get the range hood done at this cheap price. I may give it a try and be back with reviews. Thanks for your awesome tips.
Hey Kymena! We vented it outside through the walls. We actually sold this home a couple years ago so don’t have any pictures of the inside. We also always use a Zephyr insert, which we love and trust their brand. Thanks!
I’m not understanding where the vent is because there are no pictures with it inside the beautiful case you made…. could you perhaps show us a picture of the inside so we get a better idea and also explaining what kind you put in???
Hey Kellie,
Great question! Yes there are. It varies per city and state. Sometimes with the CFM, the city has a cap on how high it can be. If they vent out there are codes for the HVAC guys to follow. You can contact your contractor or the city for their codes and regulations.
Are there any building code regulations that have to be followed for a range hood?
Hey Abby! We built the kitchen range hood and bought a broan vent for inside. They are pretty inexpensive, good quality and easy to install. http://www.broan.com/
Here’s a tutorial we did for the hood too with good DIY design plans: http://www.remodelaholic.com/kitchen-renovation-diy-range-hood-tutorial/
Just curious as to what type of vent u used behind the apron. Did you have one made ? I am trying to do something like this for my mom and haven’t found a hood to work.
Wonderful!! Thanks Eileen! Would love to see pictures!
That looks fantastic! Thanks for the tutorial. I will definitely be using it when we DIY our new kitchen.
Thank you so much! We very much appreciate it!! Thanks for a great linkup!!
Wow! You guys really had at that kitchen. Congrats on how absolutely gorgeous it turned out! I’ll be featuring this on Petite Modern Life for Think & Make Thursday tomorrow! I hope it can inspire many people!
Haha, sure you can!! 🙂 Thanks Kim!!
NICE! I don’t know that I could do this kind of DIY for my kitchen. You did a really awesome job! It looks great.
Thanks Cameron!!
It looks great! You both did an amazing job in the kitchen!