If you have lived through a home renovation, you know that dust gets everywhere! By everywhere, we mean the nooks and crannies on another floor where your reno isn’t even taking place. You find yourself cleaning up the dust for months and months and months after your project is complete.
So we can’t even tell you how excited we were that BuildClean reached out to us for a collaboration. Since I am a little tired of cleaning our client’s bathrooms that we’re not remodeling. Haha!
It was perfect timing too, because we were just about to take down a wall in a kitchen remodel we had just started. So today we’re chatting not only about the BuildClean in action, but sharing all of the details of the start of this kitchen remodel.
We are so excited we can now tell our clients that they can easily live through their renovation experience without having to find a new place to stay. We now have this wonderful unit that eliminates almost all of the dust from your home during a remodeling project. Using the BuildClean unit during a renovation project, we don’t have to clean everything (even the rooms we aren’t renovating), or deal with dangerous dust particles bothering you and us.
What is BuildClean?
BuildClean is an air filter cleaner, but it’s different from the usual dust fans and vacuums. BuildClean minimizes the migration of dust throughout a home during remodel by “scrubbing” the air that passes through it. Check this out…
Our Experience with BuildClean
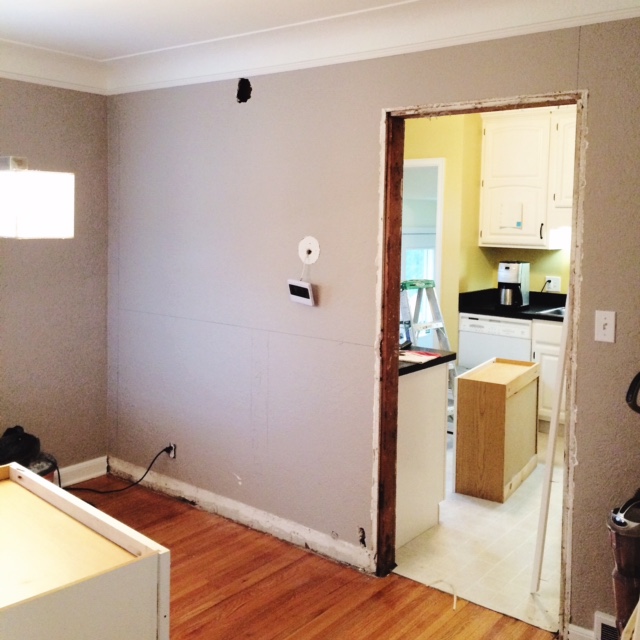
Time to chat about our first experience with BuildClean. This wall right here separates the kitchen from the dining room. Our clients love to spend a lot of time in their kitchen cooking. As we all know when we’re entertaining, the kitchen is where everyone wants to hang out. So it isn’t practical when it’s hidden away from the dining and living area.
After weeks of working with our clients on a design plan, we got to work! First on the agenda was demo and taking down this wall.
We were so impressed by the BuildClean unit! You can see in the video below the dust from the sheetrock actual going straight into the filter. We couldn’t believe the amount of dust it eliminated in the air.
We were so happy with the little clean up from dust we had to do once the wall was down! As you can see, opening up this wall immediately made the home feel so much larger.

With the wall removed, next up on our reno agenda is rearranging cabinetry, demo on floor, countertops, adding backsplash, and new appliances. Our clients wanted to go with a southern design plan.
The flooring will be replaced with Ser Brix Old Chicago 9‐1/2” x 11 hexagon tiles with Delorean Gray Grout.
We will be placing a Florida Tile, 3×6 Streamline Buff backsplash with Oyster Gray Grout. We’ll also be replacing the countertops with Caesarstone Shitake Quartz with a single under-mount sink.
That area right there was a former doorway going into their bedroom areas. We had to think smart and do some rearranging with the design since they lost so much cabinetry wall space. We decided to close off this walkway to give them back some of that lost cabinetry and storage space.
Rearranging the cabinetry called for a few custom pieces to bring it all together and tie it in.

We are sooooo excited to show you guys the progress and final project! I love when our clients do fun and bold designs and this is one of them! Most importantly, I loved that we got to utilize the BuildClean unit in this kitchen renovation. It is making for a much smoother and faster project, being we don’t have to spend a lot of time cleaning. Which, in the end, saves our clients money!


