How to Tile in a Weekend Video Tutorial
Step One: Decide Your Layout
Before diving into your tile installation project, take some time to plan out your design and layout. Whether it’s for a backsplash, shower surround, or floor, having a clear vision will streamline the process and ensure a cohesive look. Consider the dimensions of the space, how different shapes can complement each other, and explore various color options, mixing and matching possibilities, and different layout styles.
Another factor in determining your layout is deciding what size grout joints you will want. Grout joints are simply dependent on the size of spacer you choose. A good rule of thumb for deciding grout spacing is the size of tile. Larger tile can pull off a larger grout line and smaller tile generally look better with a smaller grout line. If you are doing a subway tile or a small tile similar to subway a 1/16th” or 1/8th” spacer is what we would recommend. We don’t recommend going over a 1/4″ spacer unless the specific tile calls for a larger grout joint.
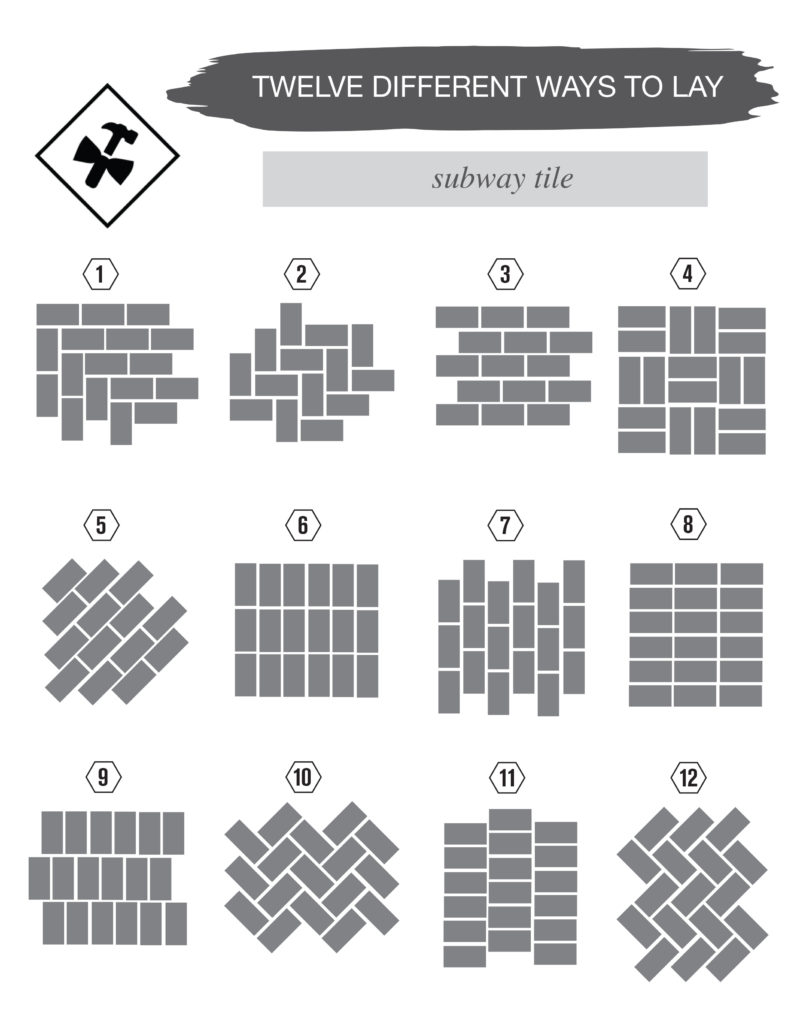
Subway tile remains a favorite for the public, for its timeless appeal, and we’ve prepared a comprehensive guide on “12 Different Ways to Lay Subway Tile” to help you explore the versatility of this classic choice.
Additionally, our friends at Mercury Mosaics have curated a guide featuring their “6 Most Creative Tile Patterns,” which serves as a fantastic source of inspiration for your project. Drawing from their expertise can infuse your design with innovative flair and artistic touches.
Step Two: Tools and Materials
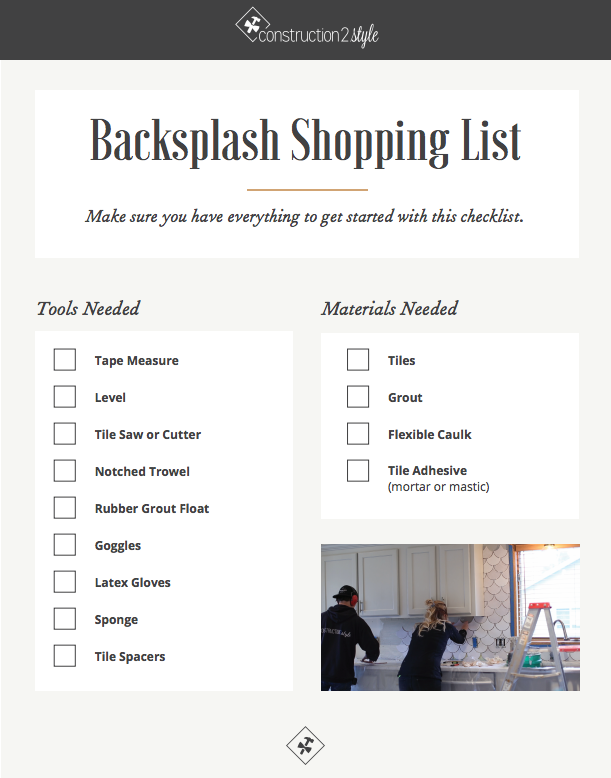
Tools Needed:
- Tape Measure
- Level
- Caulk line or laser level
- Tile Saw or angle grinder with tile blade
- Notched Trowel
- Rubber Grout Float
- Glasses
- Dust mask
- Drill
- Mixing paddle
- Latex Gloves
- Sponge
- Tile Spacers
- Tile marker
Materials Needed:
- Tiles
- Tile spacers
- Backer board
- Screws
- Mortar
- 5 Gallon buckets
- Grout
- Flexible Caulk
- Sponge
Download this PDF list for the tools and materials.
Step Three: Prep Your Space
While it may not be the most enjoyable aspect of tile installation, proper preparation is crucial for a successful outcome. Before you begin laying new tiles, it’s essential to demolish any old tiles and clear the room to create a blank canvas for your project.
Start by ensuring that the surface you’ll be tiling on is as level as possible. For a backsplash installation, remove switch plate covers, tape off cabinetry, and move any freestanding appliances away from the walls to facilitate the process. Additionally, ensure the room is thoroughly cleaned and be prepared for some mess as you embark on this important step.
Know your options for surface prep. If you are installing on a wood subfloor you can use a tile backerboard (cement board), drypack mix, or a pourable floor leveler. If your installing a backsplash drywall will suffice or if you need to patch a tile backer will give you a better surface for the mortar or mastic to adhere to.
Step Four: Inspect Tile
The type of tile you choose for your space can vary, and depending on its nature, there may be slight imperfections or subtle differences in size. Handmade tiles, for instance, offer a unique and custom look that many homeowners appreciate. However, regardless of the tile type, it’s essential to inspect each tile before installation to ensure none are broken or chipped. Taking the time to examine the tiles beforehand can help prevent any issues during the installation process and ensure a smooth and flawless finish.
Step Five: Dry Layout
Before diving into tile installation on your wall or floor, it’s beneficial to conduct a dry layout with the tiles. This preliminary step ensures smoother progress by verifying your measurements and confirming the placement of your focal point.
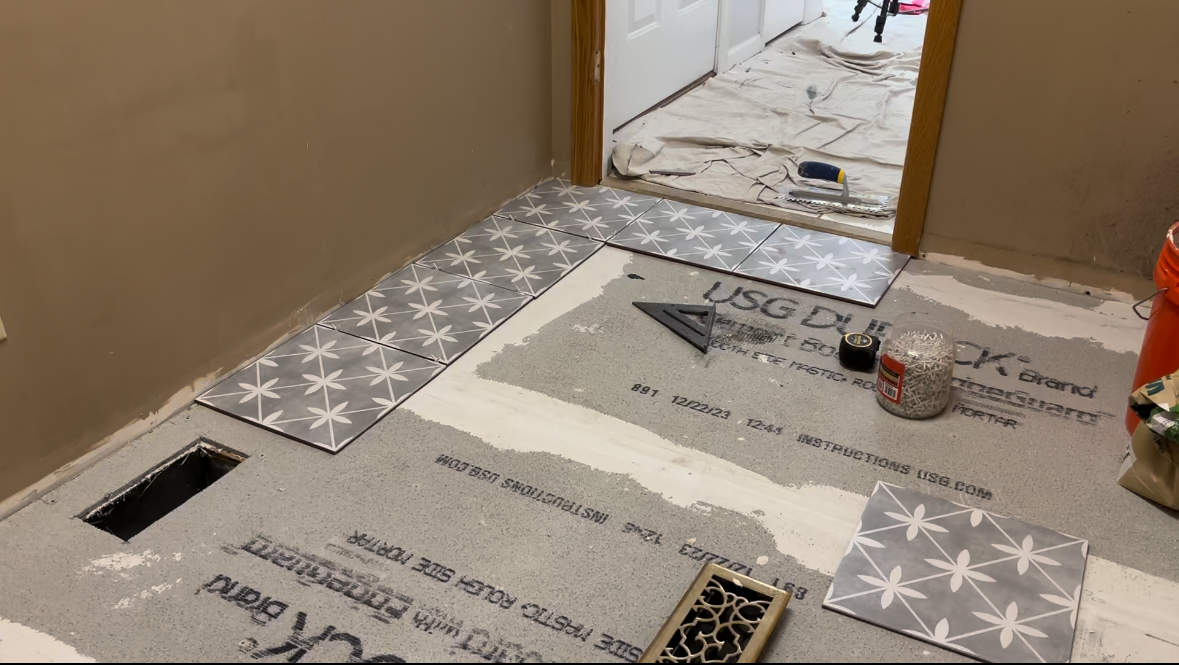
During this dry layout phase, take the opportunity to finalize the layout pattern you’ve chosen, whether it’s herringbone, subway, or another design. Lay out the tiles according to your preferred arrangement before beginning the installation process. Start by measuring the area you’re working on, then replicate those measurements on the floor and mark them off.
For patterned tile installation on the floor, begin by locating the center of the room, which serves as the focal point of the design. If you’re creating a central rug-like design, measure the area to be tiled and find the center of two opposite walls or sides.
Using these points, snap a chalk line across the length of the area at the center of the floor, effectively dividing the room or area in half. Then, snap another chalk line perpendicular to the first so that the two lines intersect at the center of the room.
Verify the accuracy of the center point using a carpenter’s square to ensure a precise 90-degree angle at the intersection of the lines. Start by placing a tile at this intersection and use the lines as guides as you progressively work outward toward the walls in each quadrant, maintaining the desired pattern layout.
Step Six: Lay Mortar + Tile
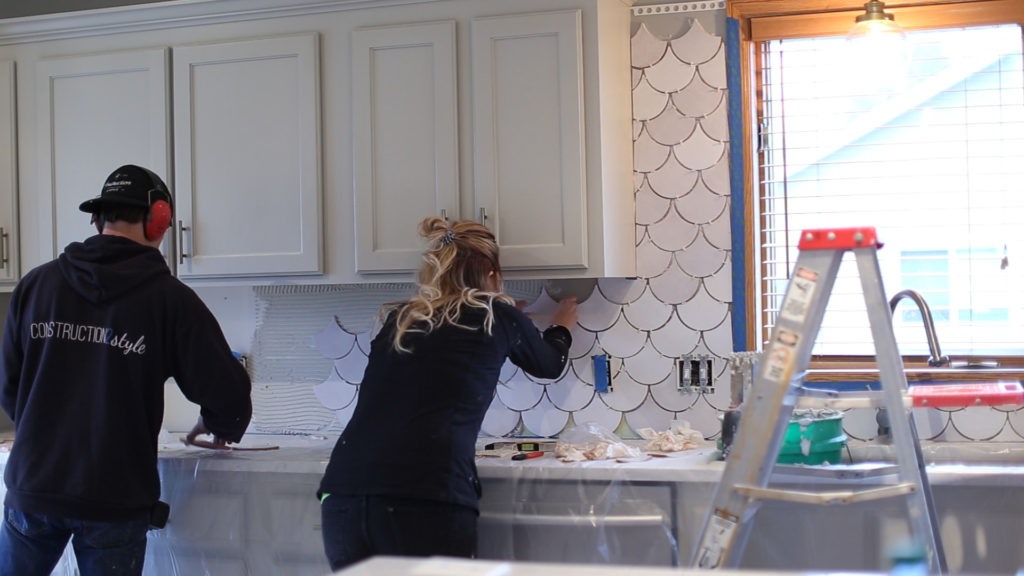
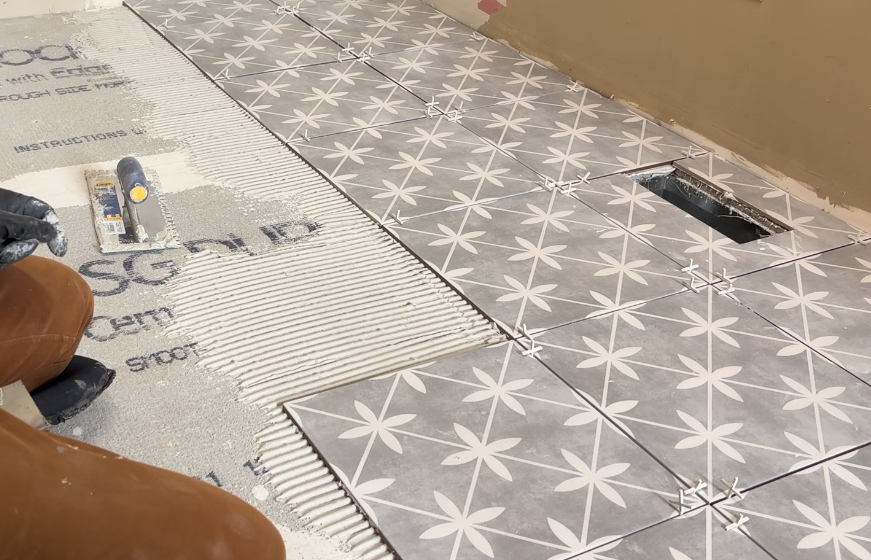
After mixing the mortar to the desired consistency, use the flat side of your trowel to spread it evenly onto the backer board surface. Then, flip the trowel over and use the notched edge to create uniform ridges in the mortar.
For this specific task, we opted for a 1/4″ x 1/4″ notched trowel. Once you’ve applied an adequate amount of mortar to a section of the surface, carefully pick up your tiles from the dry layout and begin placing them into position, pressing gently to ensure proper adhesion to the mortar.
As you approach the edges during tile installation, it’s best to wait until you’re ready to set the tiles before cutting them. This ensures accuracy and allows for adjustments as needed. While one person is setting the tiles, the other can focus on cutting them to size.
Utilize a tile installation pen to mark the spots on the tiles where clean-cut lines are needed. This method allows for precise cutting and ensures that each tile fits perfectly into place, maintaining the integrity of the overall design.
Step Seven: Grout
Before proceeding with grouting, it’s crucial to allow sufficient time for the mortar and tiles to dry and set completely. We recommend waiting at least 24 hours to ensure that the tile is firmly in place and to minimize the risk of shifting.
When you’re ready to mix the grout, carefully follow the instructions provided on the packaging. Ensure that you apply enough grout to fill in all the small gaps between the tiles.
Using a rubber grout float, make sweeping motions over the tiles at a 45-degree angle to ensure that the grout is thoroughly packed into the spaces between the tiles. Work methodically along your wall or floor, checking for any air bubbles and ensuring that the grouted areas are uniformly filled. This step is crucial for achieving a professional-looking finish and ensuring the durability of your tile installation.
If you’re working alone, it’s essential to move quickly during the grouting process as grout tends to dry rapidly. To expedite the process, consider working in a team of two individuals.
One person can apply the grout while the other follows closely behind, cleaning the excess grout off the tiles. It’s crucial to remove any dried grout from the tiles promptly as it can be challenging to remove once it sets.
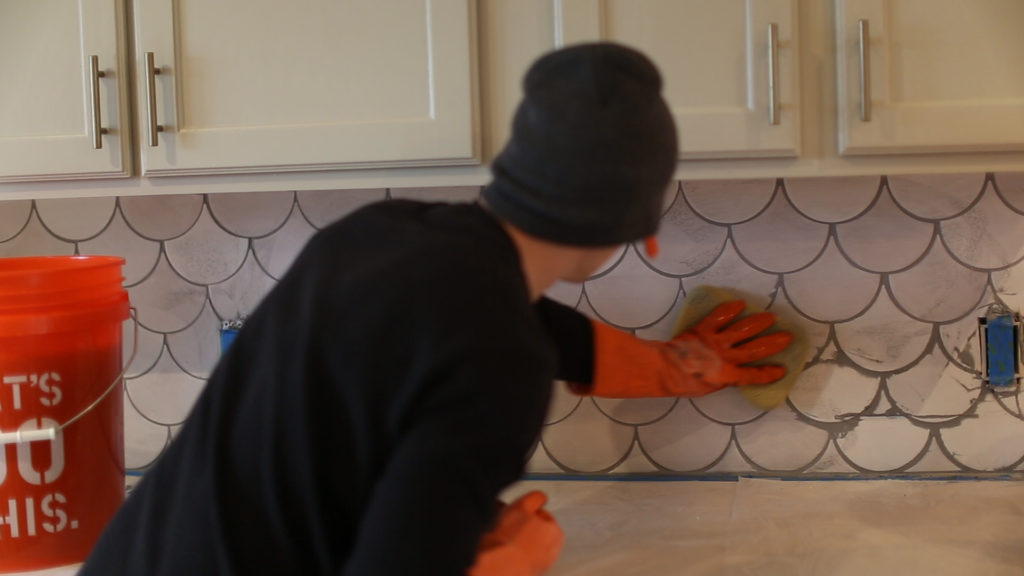
For wiping off the grout, keep a five-gallon bucket of water and a large sponge handy. Use the sponge to wipe the tiles down and lightly brush over the grouted areas, ensuring thorough cleaning.
Ideally, you should wipe the tiles a minimum of two to three times to remove excess grout, followed by using a dry rag to eliminate any dried grout dust and achieve a clean, polished finish. This diligent cleaning process is essential for achieving professional results and preserving the appearance of your newly tiled surface.
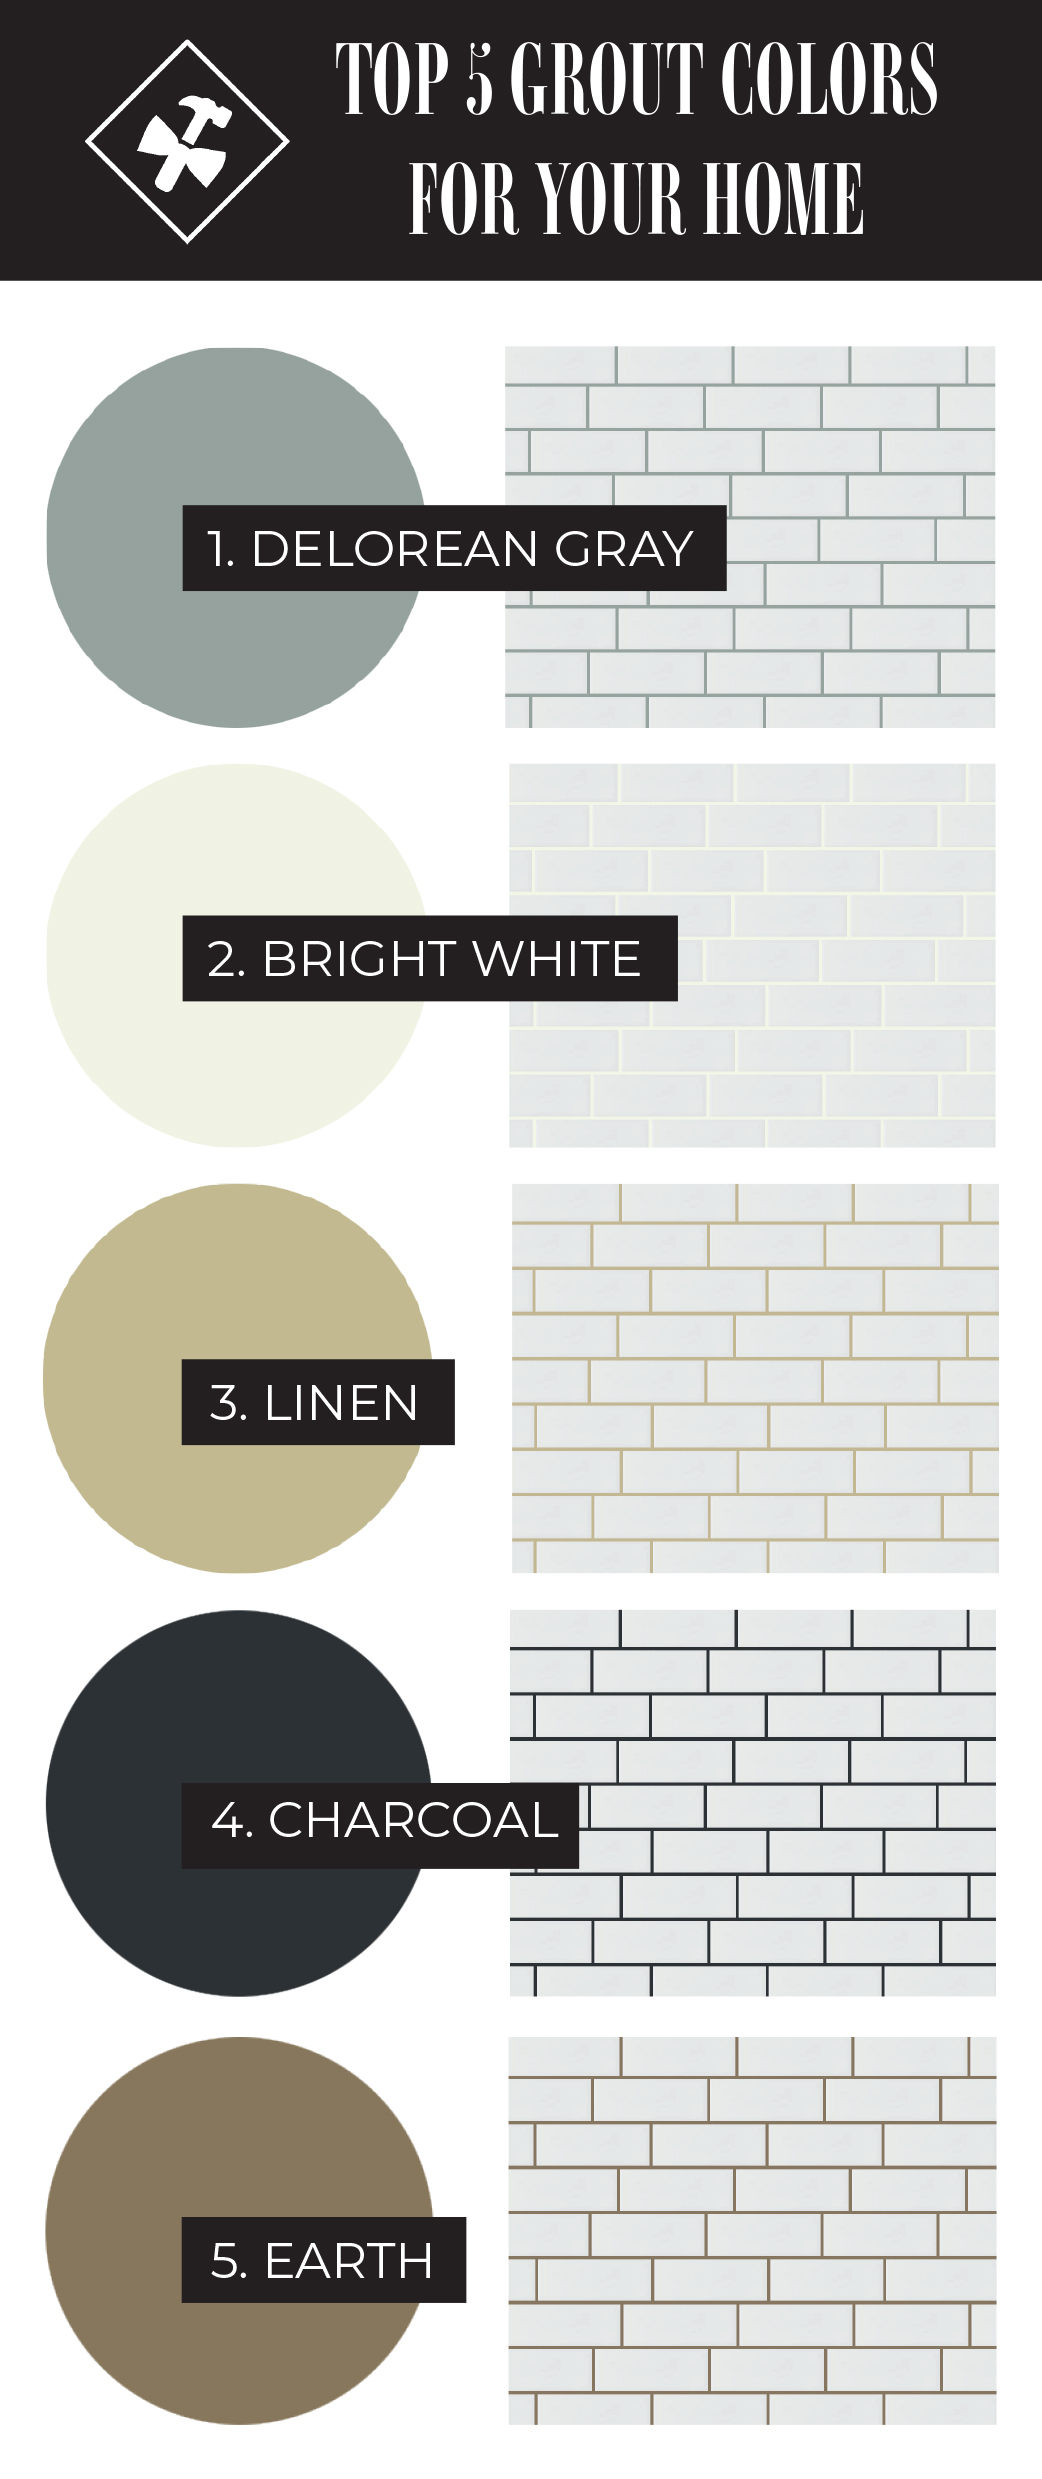
Our Favorite Grout Colors
Grout color selection can sometimes be a challenging decision. If you find yourself uncertain about which grout color to choose, we’ve compiled a helpful guide titled “How to Choose the Perfect Grout Color.” In this guide, we highlight the top five grout colors that we recommend, providing insights and tips to assist you in making the best choice for your project. Whether you’re aiming for a classic look or something more contemporary, our guide can help you navigate the options and find the perfect grout color to complement your tiles and enhance the overall aesthetic of your space.
Tile Installation Tips, Don’t Forget:
- Remember that preparation is 75% of a successful design and renovation job.
- Always order 10% more tile than you think you need.
- Lay all of the tiles out before installing them.
- Have a helper cut the tiles for you.
- Always make sure to use your level periodically to ensure each row is straight.
- Let the tile dry for 24 hours before grouting.


Excellent blog post! These tips are pretty good, Your post made it very easy to understand and I think that these tips are very helpful. I like the way you explain things. Keep posting Thanks.